1. The User Interface
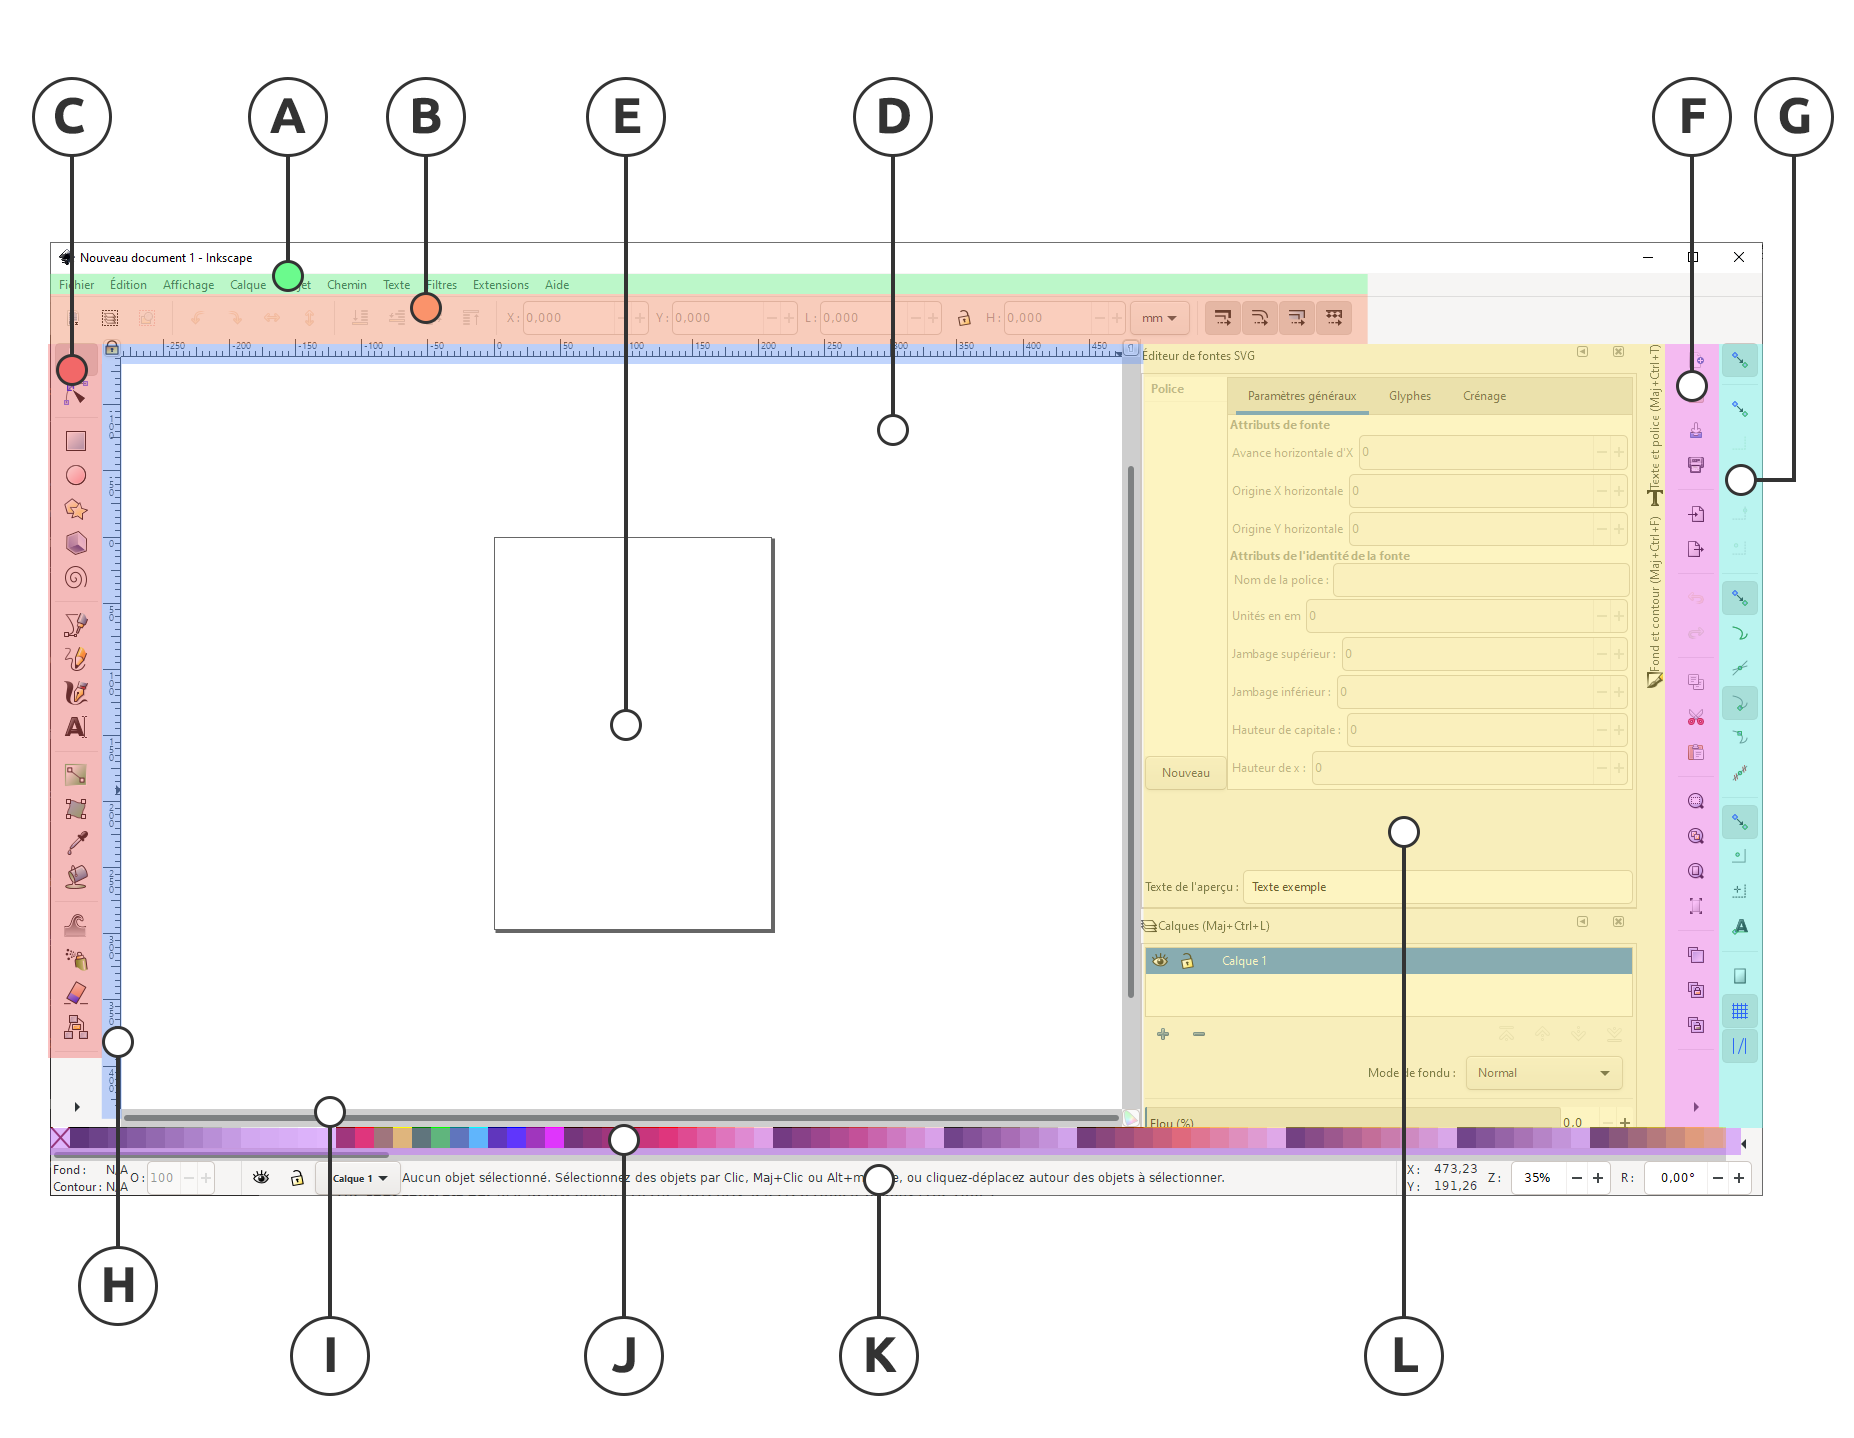
Inkscape shows a window for each opened document. Each window contains the toolbars and a white, empty area.
| Mark | Name | Description |
|---|---|---|
| A | Menu bar | The application menu bar along the top provides general menu options. Some are similar to other software programs (File ‣ Save, Edit ‣ Copy, etc.). There are also Inkscape-specific items. |
| B | Tool controls | The tool controls bar just below adjusts to the currently selected tool. It displays the tool’s options. |
| C | Toolbox | Vertically on the left, the toolbox contains the main drawing tools. Only one tool can be selected at once. |
| D | Canvas | The large blank area is the canvas, where the image is edited. |
| E | Page area | A black outline represents the visible page area. |
| F | Commands bar | On the right side of the window, there are two toolbars. To the left is the commands bar which gives quick access to common commands, which are also available via the dropdown menus. If not all the commands are shown, there is a right-facing arrow that gives access to the hidden choices. |
| G | Snap controls | On the right side of the window, there are two toolbars. To the left is the commands bar which gives quick access to common commands, which are also available via the dropdown menus. If not all the commands are shown, there is a right-facing arrow that gives access to the hidden choices. |
| F | Commands bar bar | To the right is the snap controls bar. We suggest you deactivate snapping for now, by pressing the topmost button in the bar, or by pressing %. |
| H | Rulers | There are rulers at the top and on the left of the canvas to help with grid and guideline placement. |
| I | Scrollbars | Scrollbars are available to the right and bottom to move around on the canvas. |
| J | Color palette | The color palette is near the bottom of the window. Its most basic usage is to change the fill color of an object. See also The Color Palette. |
| K | Status bar | At the very bottom, the status bar provides information such as the colors of the selected object, layers, cursor coordinates, and zoom level. It also contains a field where Inkscape can display helpful texts, such as the number and type of selected objects, or tips about keyboard shortcuts and usage hints. Whenever Inkscape doesn’t do what you think it should be doing, look here first. |
| L | Docking Area | Dialogs for specific functionality are available will by default appear attached to the right of the canvas, in the docking area. |
2. Managing the workspace
Document Properties Dialog
By default, Inkscape creates documents in a size that fits your operating system language (that is, in the US, you get a different default document than in Germany, for example). To change the page size, click File ‣ Document properties… (or click on the next to last icon on the commands bar, which looks like image0, or use the Shift + Ctrl + D keyboard shortcut). In the section Page Size on the Page tab, select or define the size you wish.
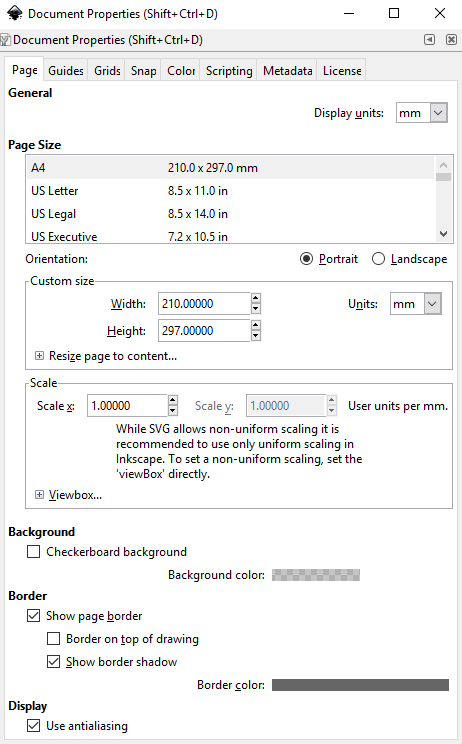
The default measurement unit for page size can be changed in the Page Size section of the same Page tab.
The large rectangular line that you see on the canvas, in a new blank document, is the page border. If you compare the page border to the rulers, you can see that it represents the page size. Note that the page border is never seen in exported or saved files.
Most of the time, everything that you want to show up in your finished drawing, must be inside this border. Elements placed outside of the page border usually can’t be seen when you share your drawing, and can be thought of as drafts, experiments or available resources.
If you do not want to see the page border while you’re working, you can uncheck the option Show page border in the Page tab to hide it. You can also configure the page shadow and color of that shadow, in that section, if you like.
In Inkscape, the canvas appears white. Even though it does not use the traditional checkerboard pattern to indicate transparency (by default), it really is transparent. If you’d like to see a checkerboard pattern for transparency, please check the Checkerboard background option in the section Background on the Page tab.
When a drawing is exported to a PNG format, areas on the page where there is no object will be transparent. You can change this by putting an opaque object behind your drawing (usually a rectangle, the same size as the page).
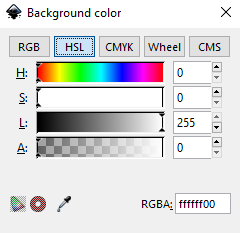 Another way to change this is by clicking on the color bar in the Background section of the Page tab, and setting the A slider (“A” for Alpha ) to 255, or all the way to the right. You can also change the color, if you like. Note that this setting only affects how the image looks in Inkscape or when you export to PNG.
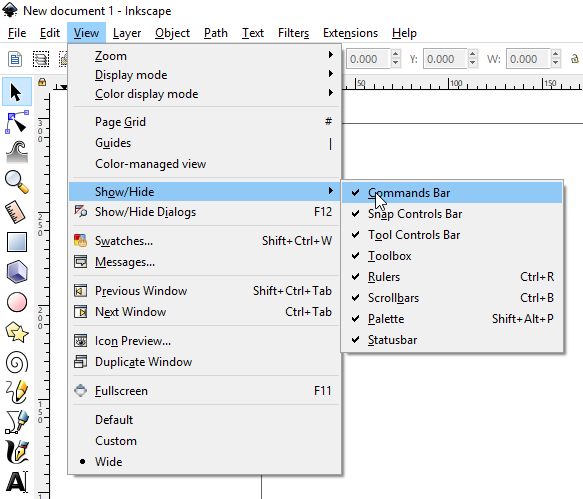
Options in ‘View’ Menu
Many people use Inkscape with no scrollbars and no snapping. Any unneeded bars can be hidden in the menu View ‣ Show/hide. The canvas can be moved using the middle mouse button.
3. Ways of Drawing in Inkscape
Inkscape offers several ways for creating vector images, which can, of course, be combined:
- using the geometric shape tools
- using the path tools, much like a pencil on paper
- starting from a photo, a scanned image, or any raster graphic by using a tracing engine
- using one of the many available features that let you create elements of a drawing automatically
In this section, we’ll start out by exploring the easiest way to create a drawing in Inkscape: the shape tools. We will also get to know some of the most commonly used tools or features. If you have any prior experience with raster graphics (such as editing photos), you will also begin to discover how creating and editing vector graphics is so very different.
4. The shape tools
Geometric shapes, despite their simple look, are useful for many drawing techniques (and not only vector drawing). With path operations (Union, Difference, etc…), you can quickly get awesome results from some elementary shapes. You can even further improve that with path tools. Both path operations and path tools are detailed in later sections.
Let’s draw some geometric shapes. All the shape tools follow similar rules to let you create and edit your shapes. But each tool has specific options: for example, a circle can become a pie wedge, or a rectangle can have its corners rounded.
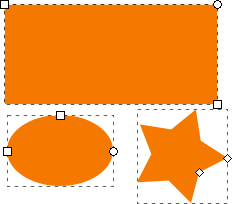
To create a geometric shape:
- enable the relevant tool in the toolbar by clicking on it;
- on the canvas, press the mouse button and hold while you drag the mouse;
- release the mouse button to display the shape.
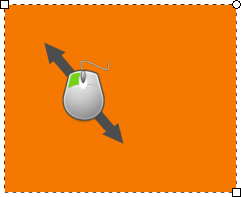
Once the mouse is released and the shape is displayed, various handles will become visible. Many of Inkscape’s tools use handles for one purpose or another. But it’s the handles of the geometric shapes which are used for creating many fancy and exciting effects. The handles may be tiny circles, squares and/or diamonds. Sometimes, the same handles can be available for different tools. We will learn more about each handle’s function in the following chapters
Many features of Inkscape are accessible through keyboard shortcuts, and sometimes even only through key shortcuts. While drawing your shape:
- press Ctrl while you drag the mouse, with the Rectangle and Ellipse tools, to create squares and circles;
- press Shift while you drag to draw from the center, rather than from one corner.
Try drawing some shapes, with and without those keys to get an idea of how they can be used.